How to Use
Template Selection
Once you have signed up and confirmed your email, you will be directed to the template screen. From here, you will simply select the template that best suits your business.
If there is no template representing your business, you can start from scratch or tailor based on a similar business type

General Setup
Selecting your template will automatically create core booking settings (These can still be changed if preferred).
When you reach your dashboard, you will see a quick-start guide which will help guide you through the main process.
Click each tab to progress through the guide e.g. click business hours

Business Hours
Input your business hours by selecting them for each day. You can add in your breaks so customers can’t book in between your time off.
To navigate to the business hours, click Settings on the left bar and navigate through General Settings

Locations
Navigate to the locations tab and select the Add new location button in the top right corner.
Now you can easily add each of your locations and add the map to your business page, for users to get directions.
To add locations, click Locations on the left bar

Add Staff
To add your staff, navigate over to the Staff tab. Now, in the top right corner, click the Add Staff button.
Input all the required information for each staff member. If you have selected Allow Login, your staff members can log in and manage their own dashboard.
You can adjust what each staff member sees by creating user roles
To add your staff, navigate over to the Staff tab

Create Services
The Services section can look overwhelming, but as soon as you add one, you will understand it.
You can either view the services as the diagram view (like the image below), or click list view to view in a list.
Firstly, you will create a category. Once you have the category, you can then create a service within the category.
To add and edit services you offer, navigate over to the Services tab

In Store Payments
For In store paymnets, Navbiigate to Settings>Payments>Payment Methods and make sure you have Local selected.

Stripe Payments
Register for Stripe:
- Visit Stripe Registration Page.
- Complete the registration form with the required information. After that, verify your email address by using the email sent from Stripe.

Set Up your Stripe Account:
- Stripe will ask you for your Business name and Business website (Choose “Skip for now” if you want to set it up later).
- Choose the features that you may need to use later on (If you don’t need any choose “Skip for now”).

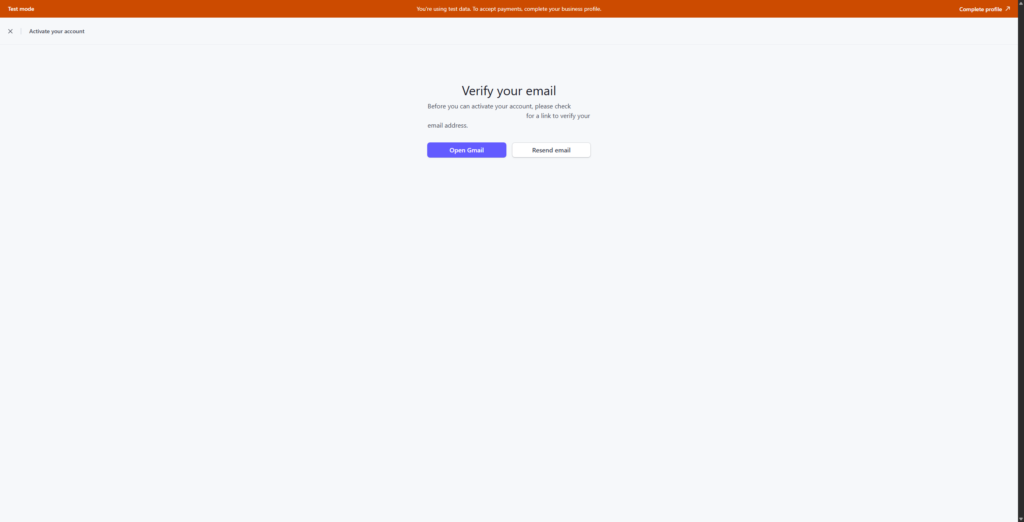
Before you can receive actual payments, you must activate your Stripe account:
Activate Payments:
- Visit your Stripe Dashboard at dashboard.stripe.com.
- Click the “Complete profile” button.

Verify your email address:
- If not done so earlier, go to your email and verify your email. If you can’t find the email, click on the “Resend email” button, and then verify your email.

Fill Out Business Information:
- Provide the required legal details, business information, and bank account details for payouts.
Review and Submit:
- On the summary step, review all provided information carefully.
- Click “Agree and submit” to activate your Stripe account fully.

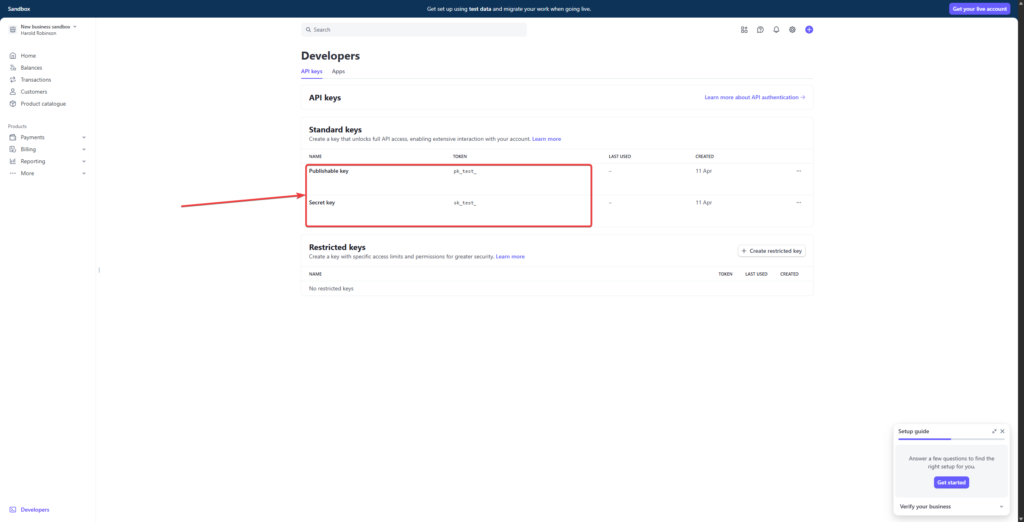
Once your Stripe account is activated, you need the API keys to link it with Booknetic:
For Testing Purposes (optional):
- Visit the Stripe Test API Keys page.
- Copy both the Publishable key and Secret key.

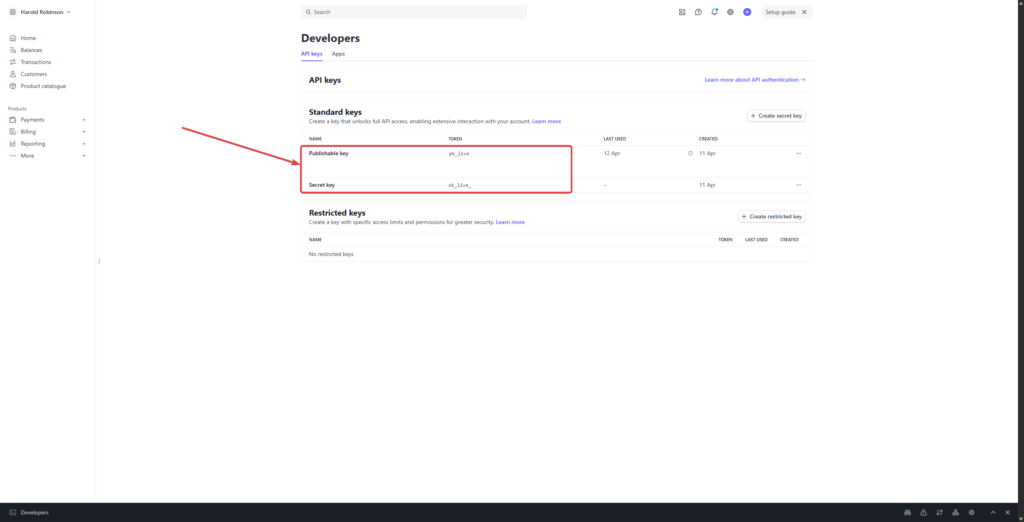
For Live Payments:
- Go to your Stripe API Keys page.
- Copy the Publishable key and Secret key shown on this page.
Now you need to integrate these keys into Get Synced:
Navigate to Get Synced Payment Settings:
- Log into your Get Sybced Admin Panel.
- Go to Settings > Payment Methods.
Enable Stripe:
- Locate the Stripe option and toggle it ON to enable.
Paste Stripe API Keys:
- Paste the copied Publishable Key and Secret Key from your Stripe Dashboard into the corresponding fields in Booknetic.

- Click “Save” to apply your configuration.
Testing Stripe Payments
To ensure your integration works correctly, consider testing with Stripe’s test mode:
- Use Stripe Test Credentials in your Booknetic settings.
- Make a test appointment booking and select Stripe for payment.
- Stripe provides test card numbers (view here) to simulate successful or failed payments.
PayPal Payments
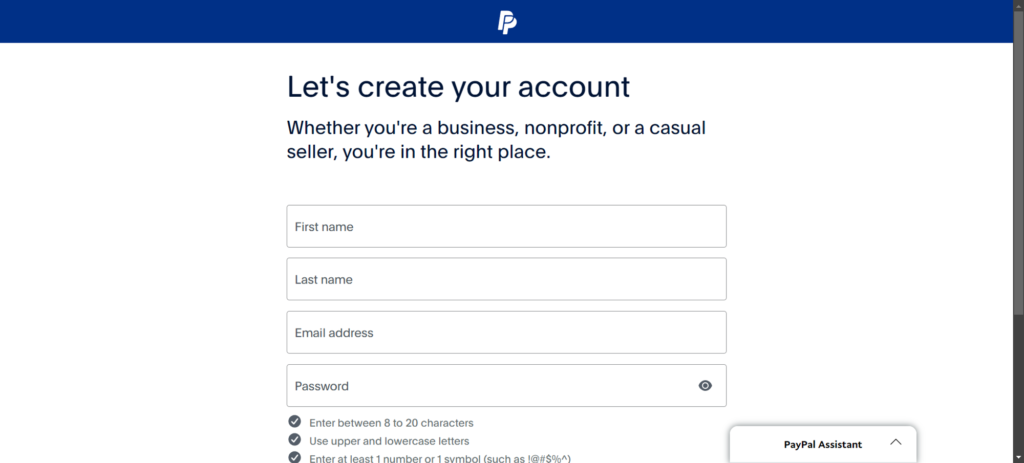
To be able to use the PayPal integration within Get Synced, you should first create a PayPal business account, and you can use the link below for that purpose
https://www.paypal.com/unifiedonboarding/entry?country.x=US&locale.x=en_US&products=EXPRESS_CHECKOUT
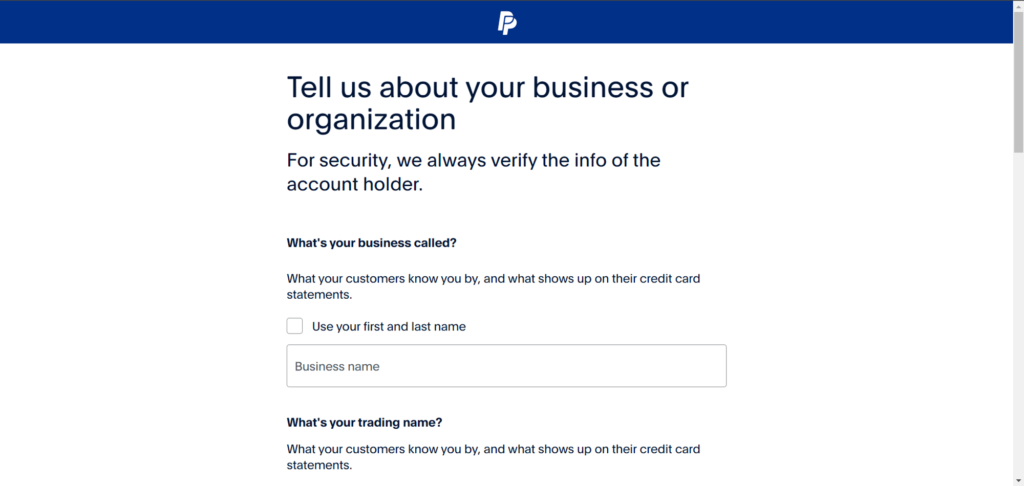
After you go to the provided link, you should see some fields that need to be filled, in order to continue with the process

After you fill out the form, you will get a prompt that asks you to confirm your email address with a code, which should be sent to the email that is specified while registering earlier

After you press the button “Email you a code”, PayPal will then send a code email, to the email address that you have specified while registering, and then will ask you to enter the code that you should have received

After you enter the code, PayPal will ask you to activate your account, in order to start using PayPal, you should answer a couple more questions, and provide some proof about yourself, and your business. To proceed, you will have to press the button “Let’s Go!”

In the next step, you will have to select your business type, which will then provide you with relevant forms to activate your account

After that, you will have to verify information about yourself, as you will be the account holder, PayPal will need to verify the information about you.

For example, if you select Individual, your business type will be chosen as “Individual or LLC (Single owner)”

After providing information about yourself, PayPal will request information about your business or organisation, and these steps should be filled with extra caution, as when incorrect information is provided, the activation may be declined by PayPal
After finishing all these questions, PayPal will ask for Proof of Identity, which means, PayPal will ask for some documentation to verify your identity and your business

After that, you will have to wait for PayPal to verify your account. After your account is verified, you shall be able to go to https://developer.paypal.com/dashboard/ to grab your API credentials, which, you will later use to receive payments from your customers.

After copying the Client ID and Secret, you will just have to paste them in your Settings > Payment Settings > Payment Methods > PayPal to be able to use your PayPal account as a payment method

But make sure that the mode is set correctly, because if you select the mode as Live in Get Synced settings but use PayPal’s sandbox credentials, then you will face errors with PayPal in Get Synced.
Sharing your page
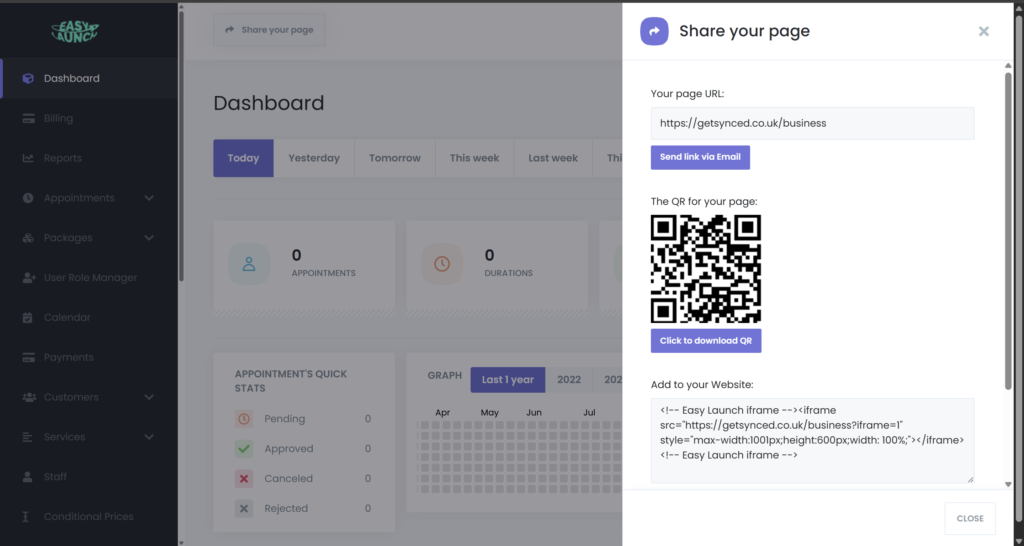
You can easily share your page, by clicking the share button at the top of your dashboard.
can copy the code in the Add to your Website: box and paste it into your website code.
If your website is built in a website builder, you can copy and paste the code into a html element.
Features
Fully Customisable Booking Widget
Custom Forms
Square Payment
PayPal Payments
Stripe Payments
Staff Commissions
Outlook Calendar
Frequently Asked Questions
Do I need a website to use Get Synced?
No. You can use Get Synced as a standalone booking page with your own branded link.
If you already have a website, you can embed the booking system directly into it.
Can I embed the booking system into my existing website?
Yes. Get Synced can be embedded into WordPress, Wix, Squarespace, or any website using a simple embed code.
In your Dashboard, you can click share and have options for QR code, Booking link and Embed Code.
Can I control staff schedules and availability?
Absolutely. You can set working hours, breaks, holidays, and control which staff members offer specific services.
Does Get Synced send reminders?
Yes. Automated email and SMS* reminders help reduce no-shows and missed appointments.
*SMS Reminders need to be set up by each user
Can I take deposits or full payments online?
Yes. You can choose to:
Take full payment
Take a deposit
Or allow customers to pay in person
What if I have multiple locations?
Higher-tier plans support multi-location setups so you can manage everything from one dashboard.
Is customer data secure?
Yes. Get Synced is fully GDPR compliant and securely stores customer data using encrypted systems.
Can I customise the booking form?
Yes. You can add custom fields to collect the information your business needs (e.g. vehicle registration, medical details, etc.).
What happens if I need help?
We provide onboarding support and ongoing assistance to make sure your system runs smoothly.